Ajax (Asynchronous JavaScript and XML) is a web development technique that allows for dynamic, asynchronous communication between a web browser and a server without the need for a full page reload. It was popularized by Jesse James Garrett in 2005 and has since become a fundamental part of modern web development.
WordPress, being a versatile and widely used content management system (CMS), provides support for Ajax to enhance the interactivity and responsiveness of websites built on its platform. Ajax in WordPress is primarily implemented using JavaScript, which is executed on the client-side, and PHP, which runs on the server-side.
WordPress leverages Ajax in various scenarios to enable dynamic content loading, form submissions, and real-time updates without interrupting the user experience. Here are a few key areas where Ajax is commonly employed in WordPress:
- Theme Customization: Ajax allows users to customize their WordPress themes in real-time without having to save changes and reload the entire page. Elements such as colors, layouts, and widget positions can be modified and previewed instantly.
- Commenting System: When users submit comments on WordPress blog posts, Ajax enables the comments to be sent to the server without refreshing the page. The new comment can then be dynamically added to the comment section, providing a seamless user experience.
- Search and Filtering: Ajax-powered search functionality is often implemented in WordPress to display search results instantly as the user types, providing immediate feedback and reducing the need for page refreshes. Similarly, Ajax is used for filtering and sorting content on category pages, allowing users to refine their results dynamically.
- Pagination and Infinite Scrolling: WordPress websites with large amounts of content often implement Ajax-based pagination or infinite scrolling. This technique loads additional content as the user scrolls down the page, eliminating the need for manual page navigation and enhancing user engagement.
- Form Submissions and Validation: Ajax is utilized in WordPress to handle form submissions asynchronously. Form data can be sent to the server for processing, and the server’s response, such as success or error messages, can be dynamically displayed to the user without reloading the entire page. This enables a smoother form submission experience.
WordPress provides built-in JavaScript functions and PHP hooks to facilitate the implementation of Ajax functionality. Developers can utilize JavaScript libraries like jQuery, which simplifies Ajax requests and provides convenient methods for handling server responses.
In summary, Ajax plays a significant role in enhancing the interactivity and responsiveness of WordPress websites. It allows for seamless communication between the browser and server, enabling dynamic content updates, form submissions, and real-time interactions without the need for page reloads. By leveraging Ajax, WordPress developers can create engaging and user-friendly websites that deliver a smooth and interactive browsing experience.
Setting Up the AJAX Environment
Setting up the Ajax environment in WordPress involves a combination of client-side JavaScript and server-side PHP code. By following a few steps, you can enable Ajax functionality and leverage its benefits in your WordPress website. Here’s a guide on how to set up the Ajax environment in WordPress:
- Enqueue JavaScript Library: First, you need to enqueue the JavaScript library that provides Ajax functionality. WordPress already includes jQuery by default, so you can use it for Ajax requests. However, make sure to check the version of jQuery included in your WordPress installation and consider using a newer version if needed.
To enqueue jQuery, you can add the following code to your theme’s functions.php file:
function enqueue_ajax_scripts() {
    wp_enqueue_script('jquery');
}
add_action('wp_enqueue_scripts', 'enqueue_ajax_scripts');
- Create JavaScript Functions: Next, you need to define JavaScript functions that handle the Ajax requests and responses. These functions will be responsible for sending data to the server and processing the server’s response.
For example, let’s say you want to implement an Ajax-based form submission. You can create a JavaScript function that listens for form submissions, prevents the default form submission behavior, collects the form data, and sends it to the server using an Ajax request. Here’s a simplified example:
jQuery(document).ready(function($) {
    $('#my-form').on('submit', function(e) {
        e.preventDefault();

        // Collect form data
        var formData = $(this).serialize();

        // Send Ajax request
        $.ajax({
            url: ajaxurl, // WordPress Ajax URL
            type: 'POST',
            data: {
                action: 'my_ajax_action',
                form_data: formData
            },
            success: function(response) {
                // Process the server's response
                console.log(response);
            }
        });
    });
});
- Create Server-side PHP Code: On the server side, you need to handle the Ajax request and perform the necessary processing. WordPress provides hooks and actions to handle Ajax requests using PHP.
In your theme’s functions.php file or in a custom plugin, you can add the following code to create a server-side PHP function that handles the Ajax request:
function my_ajax_function() {
    // Process the received data
    $form_data = $_POST['form_data'];

    // Perform any necessary operations

    // Return a response
    echo 'Ajax request received and processed successfully';

    // Always exit after processing Ajax requests
    wp_die();
}
add_action('wp_ajax_my_ajax_action', 'my_ajax_function');
add_action('wp_ajax_nopriv_my_ajax_action', 'my_ajax_function');
In the above example, my_ajax_action is the action name associated with the Ajax request. This is used to map the client-side request to the corresponding server-side function.
- Localize Ajax URL: To ensure the correct Ajax URL is used in your JavaScript functions, you can localize the Ajax URL using WordPress’
wp_localize_script()function. This function makes the Ajax URL available as a JavaScript variable.
Add the following code to your functions.php file or custom plugin:
function localize_ajax_url() {
    wp_localize_script('jquery', 'ajax_object', array('ajaxurl' => admin_url('admin-ajax.php')));
}
add_action('wp_enqueue_scripts', 'localize_ajax_url');
Now, you can access the Ajax URL in your JavaScript functions using ajax_object.ajaxurl.
- Testing and Error Handling: After setting up the Ajax environment, you can test your implementation. Use browser developer tools to check for any JavaScript errors and examine the network requests to ensure the Ajax requests are being sent to the correct URL and receiving the expected responses.
Additionally, ensure that you handle errors and validation on both the client and server sides appropriately to provide a robust and user-friendly Ajax experience.
By following these steps, you can successfully set up the Ajax environment in WordPress. This will enable you to incorporate dynamic, asynchronous functionality in your website, enhancing user experience and interactivity.
Making AJAX Requests
Making Ajax requests in WordPress involves sending data from the client-side (JavaScript) to the server-side (PHP) asynchronously and receiving a response without reloading the entire page. WordPress provides a convenient way to handle Ajax requests using built-in functions and hooks. Here’s a guide on how to make Ajax requests in WordPress:
- Enqueue jQuery (if needed): Before making Ajax requests, ensure that jQuery is properly enqueued in your WordPress theme or plugin. By default, WordPress includes jQuery, but you may need to enqueue it explicitly if you’re using a custom theme or have disabled jQuery for some reason. You can enqueue jQuery using the following code in your
functions.phpfile or plugin file:
function enqueue_ajax_scripts() {
    wp_enqueue_script('jquery');
}
add_action('wp_enqueue_scripts', 'enqueue_ajax_scripts');
- Register and Handle Ajax Actions: In WordPress, Ajax requests are associated with specific actions. You need to register these actions on the server-side and define the corresponding PHP functions to handle the requests.
In your functions.php file or custom plugin, you can use the following code to register an Ajax action and define the corresponding PHP function:
function my_ajax_function() {
    // Your PHP code to handle the Ajax request
    // Process the received data
    // Perform necessary operations
    // Return a response

    wp_die(); // Always exit after processing Ajax requests
}
add_action('wp_ajax_my_ajax_action', 'my_ajax_function');
add_action('wp_ajax_nopriv_my_ajax_action', 'my_ajax_function');
In the above code, my_ajax_action is the action name associated with the Ajax request. You can replace it with your desired action name.
Note that the wp_ajax_ action is used for authenticated users, while wp_ajax_nopriv_ action is used for non-authenticated users.
- Send Ajax Requests from JavaScript: On the client-side (JavaScript), you can use jQuery’s
ajax()orpost()methods to send Ajax requests to the server.
Here’s an example of making an Ajax request using jQuery’s post() method:
jQuery(document).ready(function($) {
    // Attach a click event handler to a button or any other element
    $('#my-button').on('click', function() {
        // Send an Ajax request
        $.post(
            ajaxurl, // WordPress Ajax URL
            {
                action: 'my_ajax_action',
                data1: 'value1',
                data2: 'value2'
            },
            function(response) {
                // Handle the server's response
                console.log(response);
            }
        );
    });
});
In the above example, ajaxurl is a JavaScript variable that holds the WordPress Ajax URL. It is automatically localized when you enqueue jQuery using wp_enqueue_script().
Make sure to replace 'my_ajax_action' with the actual action name you registered in the server-side PHP code. You can also include additional data parameters as needed.
- Process the Ajax Request on the Server: In the PHP function defined for the registered Ajax action, you can access the data sent from the client-side using
$_POSTor$_GETsuperglobals.
Here’s an example of how to access and process the data sent in the Ajax request:
function my_ajax_function() {
    // Retrieve the data sent from the client-side
    $data1 = $_POST['data1'];
    $data2 = $_POST['data2'];

    // Process the data and perform necessary operations

    // Prepare a response
    $response = 'Ajax request received and processed successfully';

    // Return the response
    echo $response;

    wp_die(); // Always exit after processing Ajax requests
}
In the above example, $_POST['data1'] and $_POST['data2'] correspond to the data parameters sent from the client-side JavaScript.
- Error Handling and Security Considerations: When making Ajax requests, it’s crucial to handle errors gracefully and ensure proper security measures are in place. Validate and sanitize the data received on the server-side to prevent malicious activity.
Additionally, handle error scenarios in both the client-side JavaScript and server-side PHP code to provide meaningful feedback to the user in case of any issues during the Ajax request.
By following these steps, you can successfully make Ajax requests in WordPress. This enables you to implement dynamic and interactive functionality on your website, enhancing the user experience without requiring full page reloads.
Processing AJAX Responses
Processing Ajax responses in WordPress involves handling the server’s response to an asynchronous Ajax request and updating the client-side (JavaScript) accordingly. By effectively processing the response, you can dynamically update the webpage content, display error/success messages, or perform any other necessary actions. Here’s a guide on how to process Ajax responses in WordPress:
- Send Ajax Request: Before processing the response, ensure that you’ve successfully sent an Ajax request from the client-side JavaScript code. You can use jQuery’s
ajax()orpost()methods to send the request, as mentioned in the previous response.
For example, you can use the following code to send an Ajax request:
jQuery(document).ready(function($) {
    // Attach a click event handler to a button or any other element
    $('#my-button').on('click', function() {
        // Send an Ajax request
        $.post(
            ajaxurl, // WordPress Ajax URL
            {
                action: 'my_ajax_action',
                data1: 'value1',
                data2: 'value2'
            },
            function(response) {
                // Process the server's response
                processAjaxResponse(response);
            }
        );
    });

    // Function to process the Ajax response
    function processAjaxResponse(response) {
        // Handle the response here
        console.log(response);
    }
});
In the above code, the $.post() method is used to send the Ajax request, and the response is passed to the processAjaxResponse() function.
- Process the Ajax Response: In the
processAjaxResponse()function, you can handle and process the server’s response received from the Ajax request. The response can be in various formats like plain text, JSON, or XML, depending on how you’ve configured the server-side PHP code.
Here’s an example of how to process the Ajax response:
function processAjaxResponse(response) {
    // Convert the response to a JavaScript object if it's JSON
    var responseObject = JSON.parse(response);

    // Access the data in the response object
    var data1 = responseObject.data1;
    var data2 = responseObject.data2;

    // Perform actions based on the response
    if (responseObject.success) {
        // Display success message or update content
        console.log('Ajax request succeeded');
    } else {
        // Display error message or handle errors
        console.log('Ajax request failed');
    }
}
In the above example, response is the server’s response received in the Ajax request. You can parse the response if it’s in JSON format using JSON.parse() to convert it into a JavaScript object.
- Server-side PHP Response: To generate the server’s response in a format that can be easily processed by the client-side JavaScript, you need to format it appropriately in your server-side PHP code.
For example, in the PHP function handling the Ajax request, you can prepare the response as an associative array and then encode it as JSON using json_encode():
function my_ajax_function() {
    // Process the Ajax request
    // ...

    // Prepare the response
    $response = array(
        'success' => true,
        'data1' => 'Value 1',
        'data2' => 'Value 2'
    );

    // Return the response as JSON
    echo json_encode($response);

    wp_die(); // Always exit after processing Ajax requests
}
In the above example, the response is prepared as an associative array $response, which includes the success status and any data you want to send back to the client-side JavaScript.
- Error Handling and Messages: While processing the Ajax response, it’s essential to handle error scenarios and display appropriate messages to the user. You can include error messages or additional status information in the server’s response and update the client-side JavaScript accordingly.
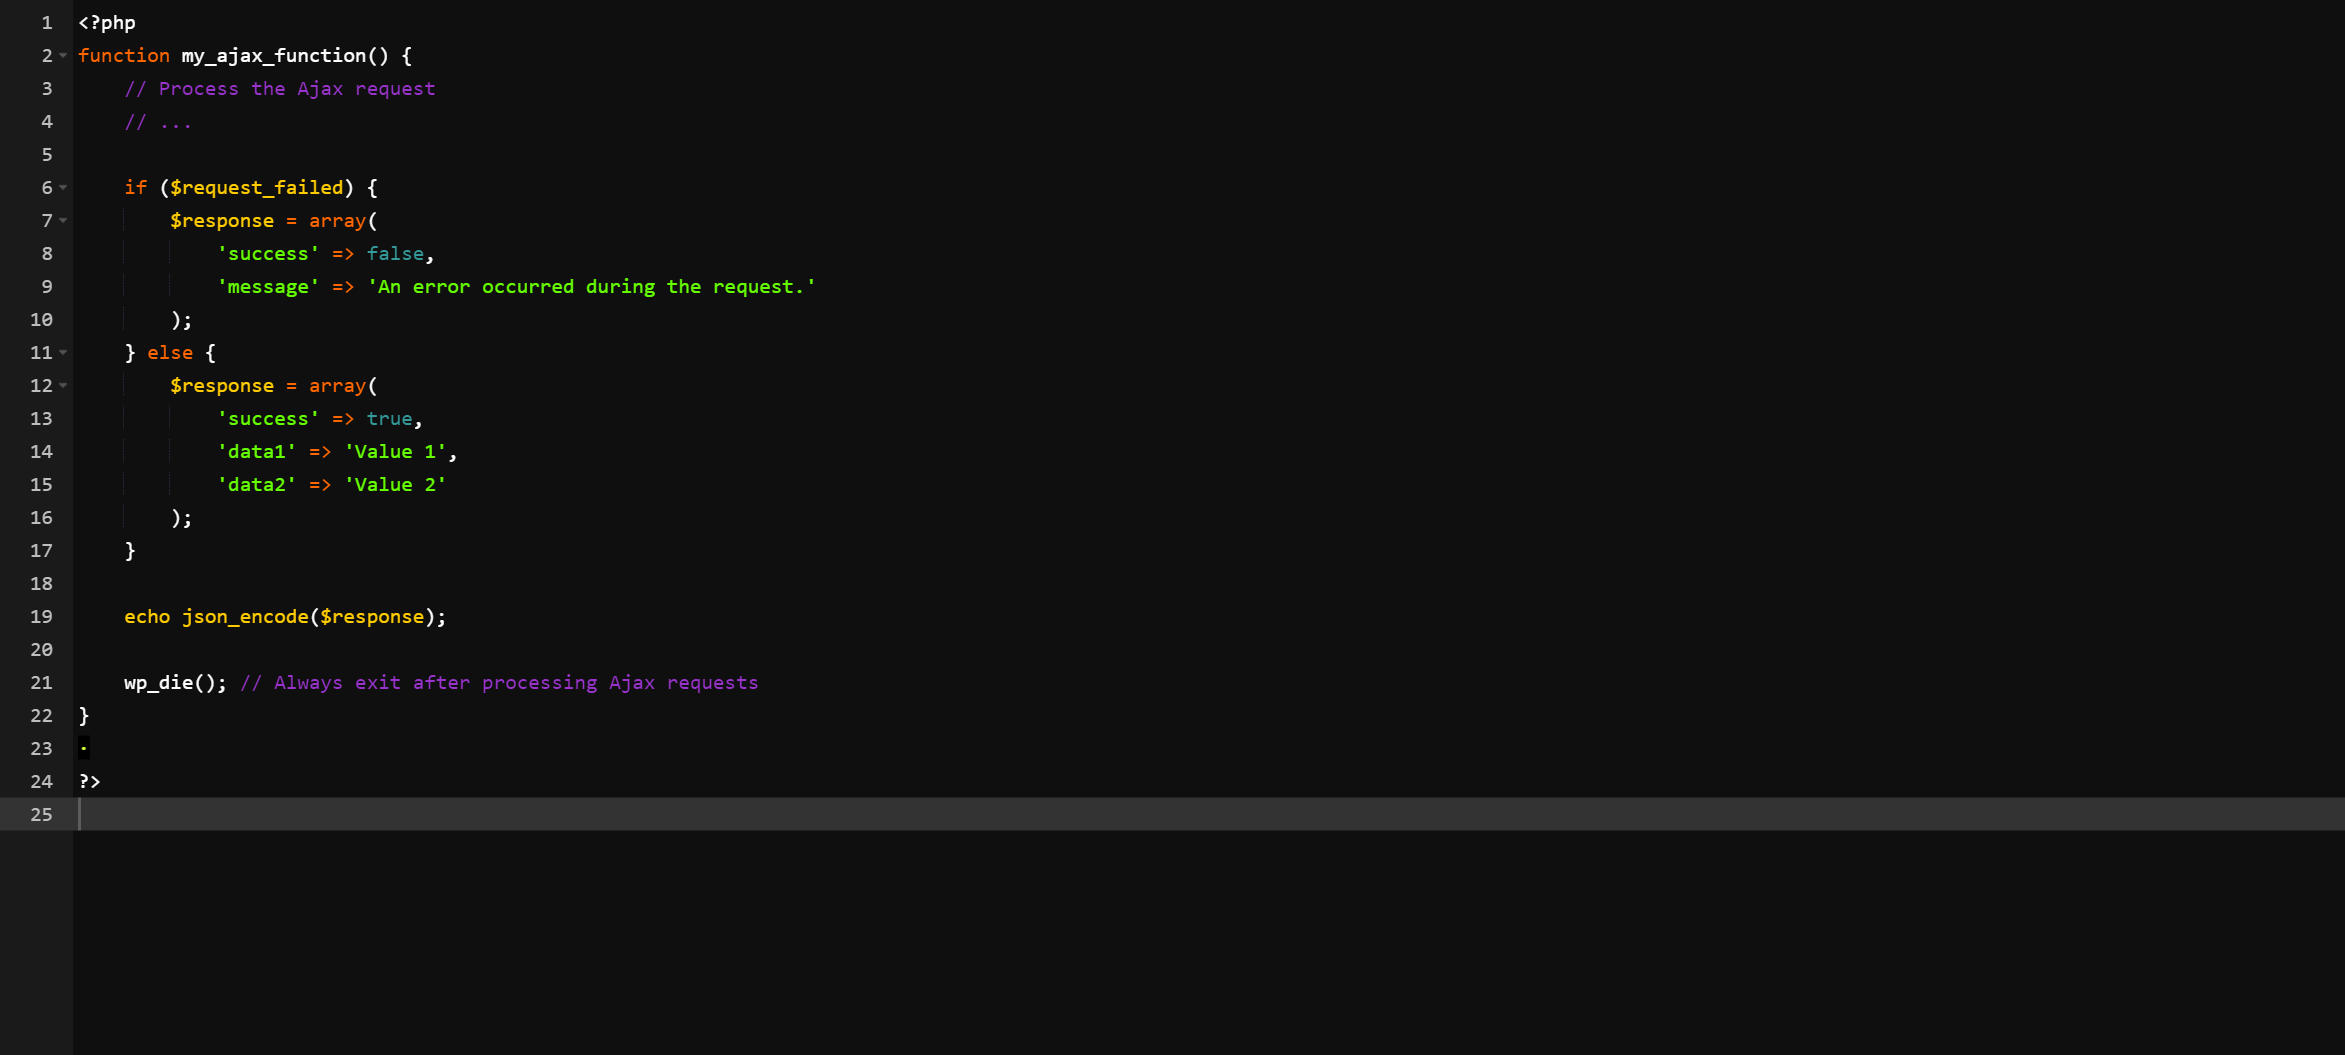
For example, in the server-side PHP code, you can modify the response to include an error message if the request fails:
function my_ajax_function() {
    // Process the Ajax request
    // ...

    if ($request_failed) {
        $response = array(
            'success' => false,
            'message' => 'An error occurred during the request.'
        );
    } else {
        $response = array(
            'success' => true,
            'data1' => 'Value 1',
            'data2' => 'Value 2'
        );
    }

    echo json_encode($response);

    wp_die(); // Always exit after processing Ajax requests
}
Then, in the client-side JavaScript, you can display the error message if the response indicates failure:
function processAjaxResponse(response) {
    var responseObject = JSON.parse(response);

    if (responseObject.success) {
        // Display success message or update content
        console.log('Ajax request succeeded');
    } else {
        // Display error message or handle errors
        var errorMessage = responseObject.message;
        console.log('Ajax request failed: ' + errorMessage);
    }
}
By following these steps, you can effectively process Ajax responses in WordPress. This allows you to handle the server’s response, update the client-side JavaScript accordingly, and provide meaningful feedback or perform desired actions based on the response data.
Recap of the benefits of implementing AJAX in WordPress
Implementing Ajax (Asynchronous JavaScript and XML) in WordPress can bring several benefits to your website. Here’s a recap of the advantages of using Ajax in WordPress:
- Improved User Experience: Ajax allows you to create dynamic and interactive user interfaces without reloading the entire page. It enables seamless and instant updates to specific parts of the webpage, providing a smoother and more responsive user experience.
- Faster Page Load Times: By loading and updating only the necessary content or data, Ajax reduces the amount of data transmitted between the client and server. This results in faster page load times since you don’t need to reload the entire page for every user action.
- Increased Interactivity: With Ajax, you can implement various interactive features such as live search, autocomplete suggestions, infinite scrolling, real-time updates, and more. These features enhance user engagement and make your website feel more modern and user-friendly.
- Efficient Data Retrieval: Ajax allows you to fetch data from the server in the background without interrupting the user’s interaction with the page. This is particularly useful when loading dynamic content from the database or retrieving data from external APIs. It enables you to retrieve and display data on-demand, improving the efficiency of data retrieval and reducing server load.
- Enhanced Form Submission: Ajax enables you to submit forms asynchronously, without refreshing the entire page. This is beneficial for validation and error handling, as you can validate form input on the client-side and provide immediate feedback to users. It also allows for conditional form submission based on server-side responses, improving the overall form submission process.
- Modular and Scalable Development: Implementing Ajax in WordPress promotes modular development practices. You can separate the client-side JavaScript code from the server-side PHP code, making it easier to maintain and update your codebase. Additionally, Ajax allows you to extend and enhance the functionality of your website without affecting the overall structure and design, providing scalability and flexibility.
- Cross-Browser Compatibility: Ajax is well-supported across modern web browsers, ensuring compatibility and consistent behavior for your website visitors. By leveraging the built-in Ajax functions and libraries in WordPress, you can rely on a standardized and tested approach to Ajax implementation.
Overall, integrating Ajax into your WordPress website can significantly enhance its functionality, user experience, and performance. It empowers you to create more interactive and responsive web pages while optimizing data retrieval and reducing unnecessary page reloads.
Recent Comments